On a Lenovo laptop, you can take a screenshot using various methods. Here are some common ways:
1. PrtScn (Print Screen) key:
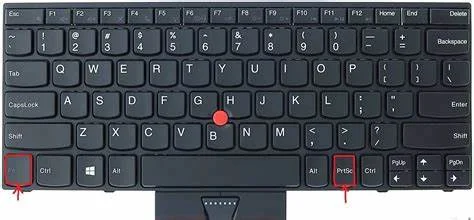
- Press the "PrtScn" key to capture the entire screen.
- Press "Fn + PrtScn" to capture an active window.
- The screenshots are copied to the clipboard, and you can paste them into an image editor (like Paint or Photoshop) or a document.
2. Snipping Tool (Windows 7) or Snip & Sketch (Windows 10):
- Search for "Snipping Tool" or "Snip & Sketch" in the Start menu.
- Open the tool and choose the type of screenshot you want (full screen, rectangular, free-form, etc.).
- Capture the screenshot and save it.
3. Snip & Sketch Shortcut (Windows 10):
- Press "Win + Shift + S" to open the Snip & Sketch tool.
- Select the area you want to capture, which will be copied to the clipboard.
4. Windows + Print Screen (Windows 8 and 10):
- Press "Win + PrtScn" to capture the entire screen and save it as a file in the "Screenshots" folder inside the "Pictures" library.
5. Lenovo Vantage (specific to Lenovo laptops):
- Some Lenovo laptops come with the Lenovo Vantage application pre-installed.
- Open Lenovo Vantage, go to the "My Device Settings" or "Hardware Settings" section and look for a screenshot option.
Choose the method that best suits your needs or preferences. The screenshots are usually saved in the clipboard or a designated folder, depending on your method.


0 Comments